
We've gotten to put our newly painted guest room to good use. Keith Allen, known to anyone who has been to Silver Dollar City as the Rednecker, and his wife stayed with us Sunday night. Very interesting guy! We definitely enjoyed having them stay and they said they really enjoyed our enormous claw-footed bathtub. Last night our youth minister and his wife and daughter spent the night. They had other accomodations that fell through so we were really happy to have a dedicated guest room that we could share on the spur of the moment. I always wanted a separate guest room with it's own bathroom and now we actually have a house big enough to have one.
We are leaving for Denver for our nephew Justin's wedding tomorrow. What do we start on when we get back? Do we hit that list of small but annoying things that need to be done? Do we start another large project such as the office so that it will be ready when we start school in August? Do we go in and do the other projects in the guest room such as the ceiling, the woodwork, the floors? I think Doug is voting for cleaning up the list of small but annoying things that need to be done. There are about 20 things on that list like moving phone lines and installing electrical outlets. You can get some fairly instant gratification out of those projects. I think that is what we'll do next.
Here's our list of small but annoying things that need to be done
1) Move the phone cords in kitchen
2) Repair the hole in the kitchen ceiling
3) Repair the hole in the bedroom ceiling
4) Put in more electrical outlets for office
5) Put up the face plates in guest room
6) Run the electrical to air conditioner
7) Put in the plexiglass panel for screen door
8) Reassemble the kitchen ceiling fan
9) Put in the glass for guest room French door
10) Get a screen panel for the back screen door
11) Shave off the door of the sunroom
12) Patch the hole in the sunroom wall
13) Put a longer coaxial cord on the tivos so we can move them where we want them
14) Assemble David’s bed
15) Build a bed frame for our bed
16) Get the dining room table and other furniture out of storage
17) Hang up a miniblind in David’s room
18) Cover the french doors in Rachel's room
If we completed this list the quality of everyday life would go up around here so I think we will hit this list when we get back from Denver.
About Me
Wednesday, July 12, 2006
Sunday, July 09, 2006
The prep is the thing
Well, our initial work in the guest room is finished. I won't say the guest room is finished because there is still the ceiling, the floor, the trim, the windows, etc. but we have finished the walls for now. I love the result.
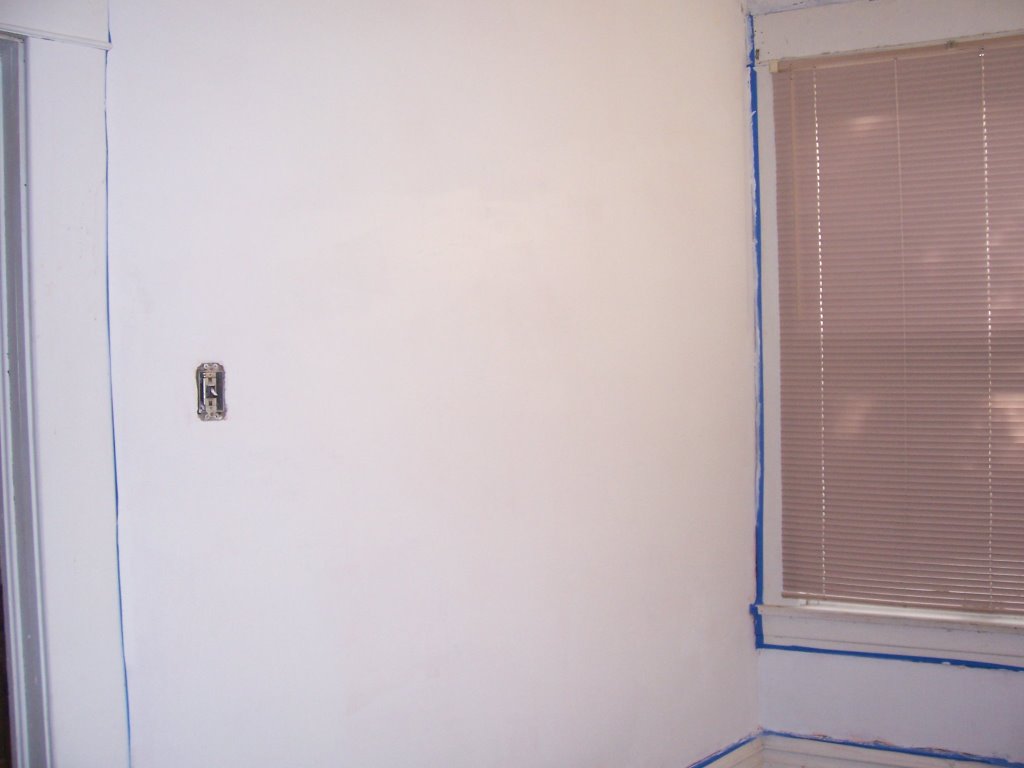
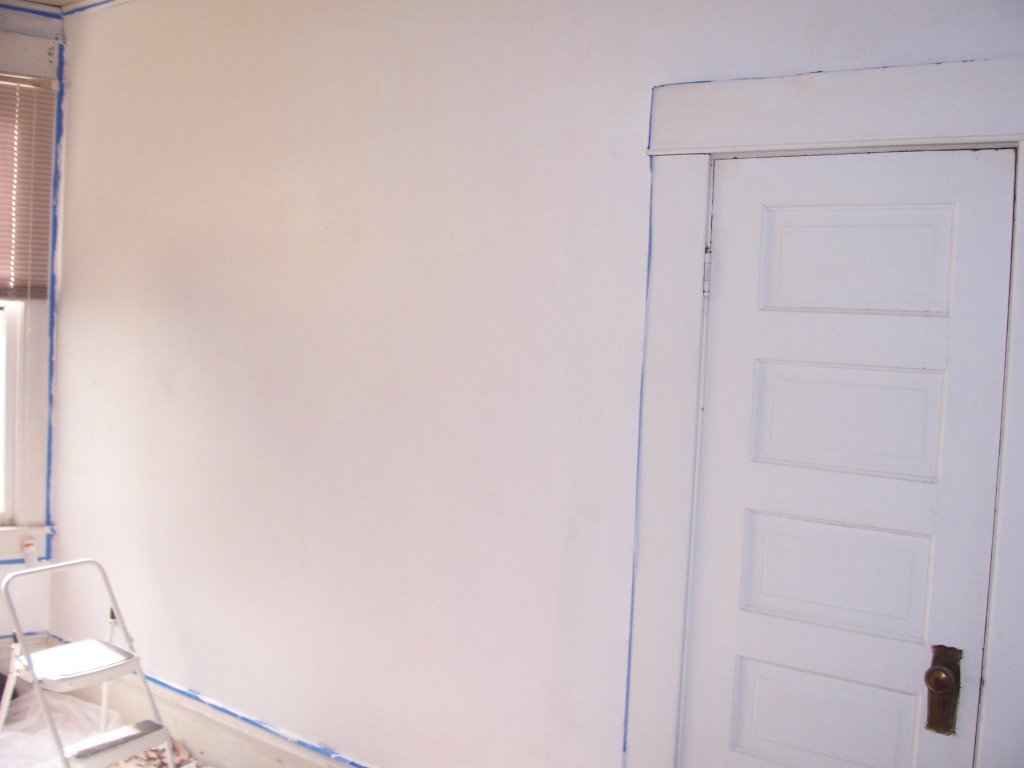
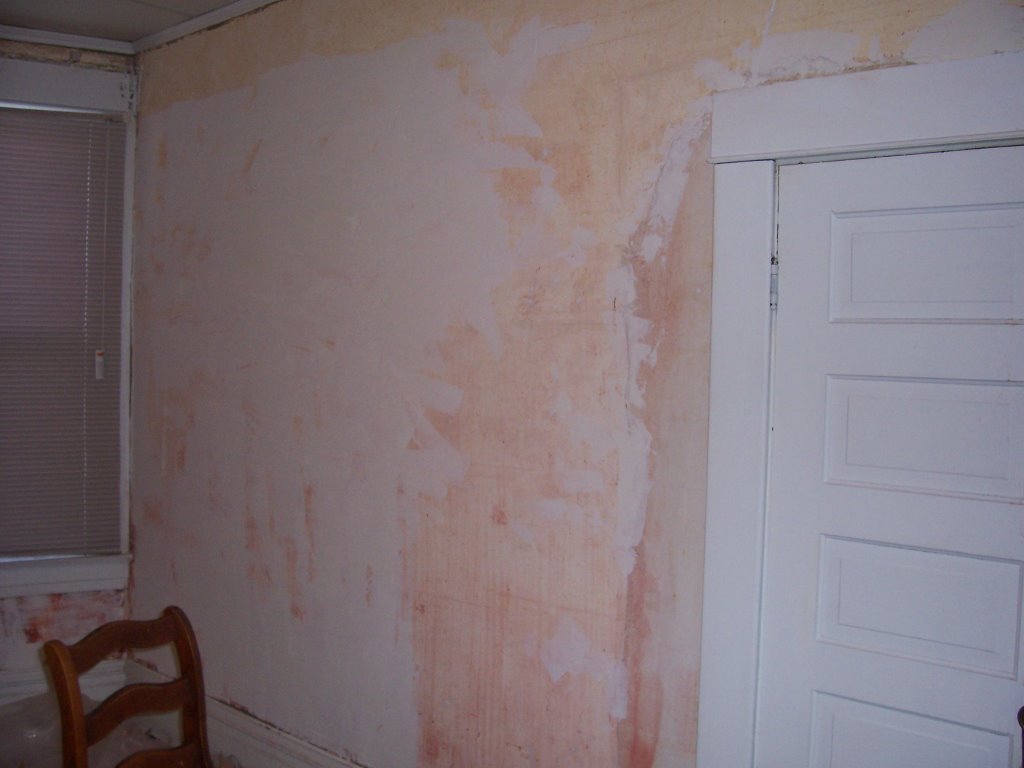
Ok, here's the story. We removed four layers of wallpaper and a layer of paint. We washed the walls extensively the remove the buildup of adhesive or something that was bright red off the walls. We patched all the holes (probably 200) with spackling. Doug skimcoated the walls with plaster. We sanded the skimcoat. We taped the woodwork because I am a sloppy painter. Then we primed. We figure we had about 40 hours of work in the room before the first coat of paint went on. I'm really proud of how smooth the walls are now. Here are the walls before paint. Doug, David and I all worked on this.


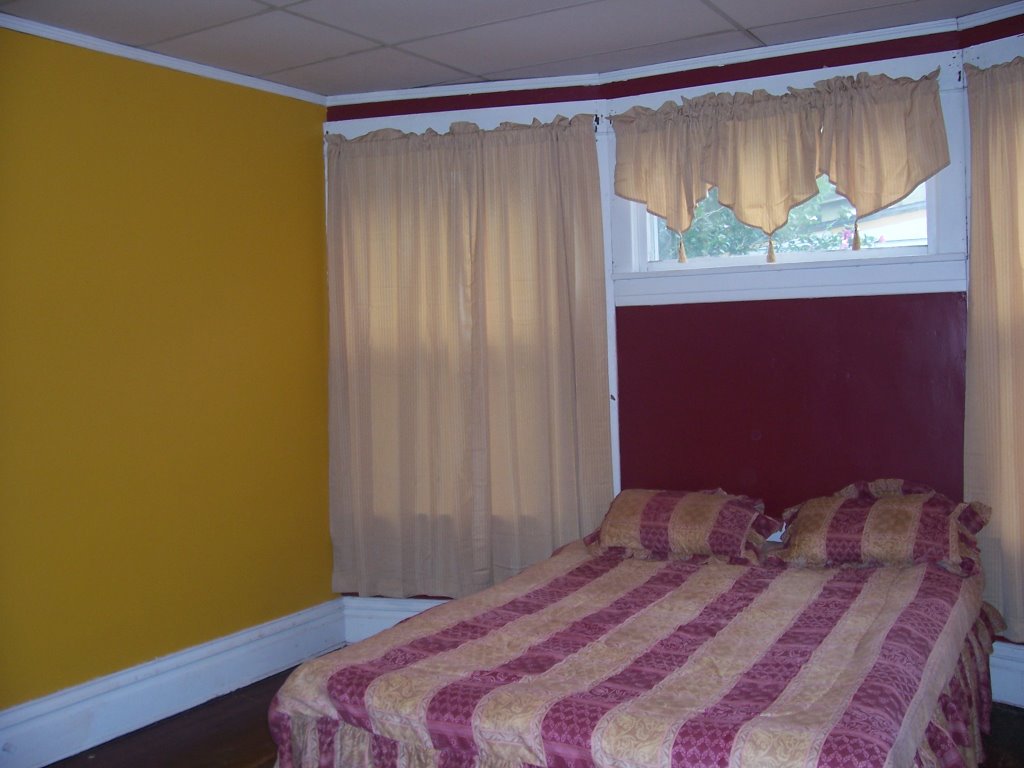
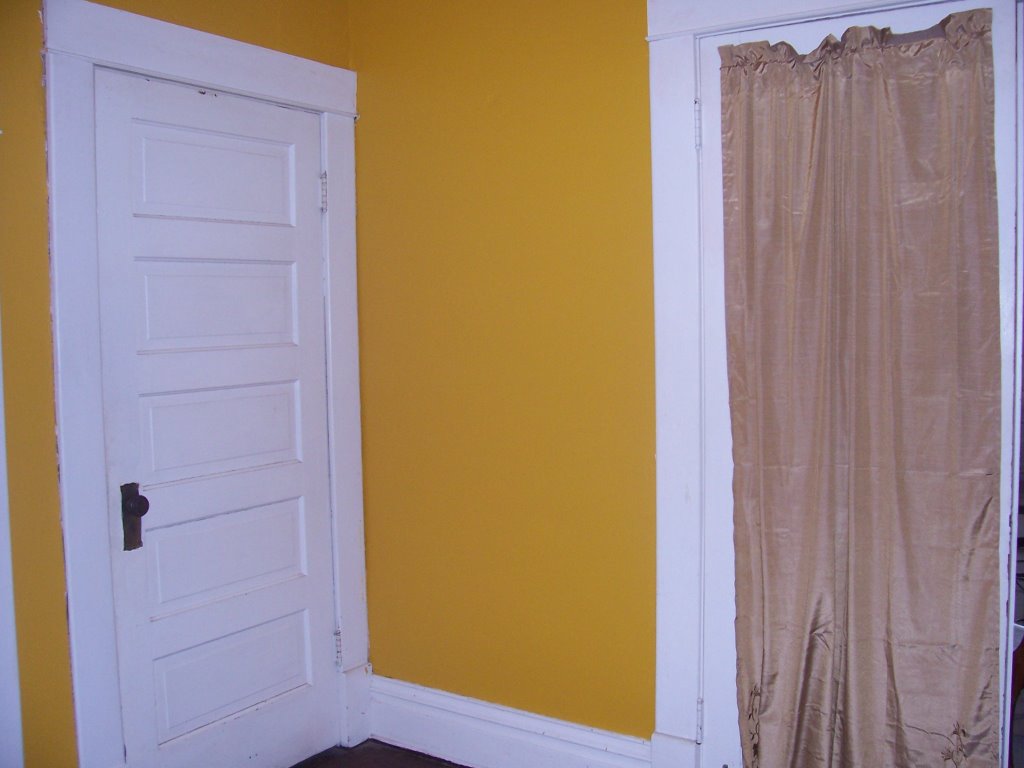
Now with paint. The gold is a very rich gold but seems to come out yellow in the pictures. I'm really happy with the way this project has turned out. And not a minute too soon because we are having company stay in this room tonight.


Ok, here's the story. We removed four layers of wallpaper and a layer of paint. We washed the walls extensively the remove the buildup of adhesive or something that was bright red off the walls. We patched all the holes (probably 200) with spackling. Doug skimcoated the walls with plaster. We sanded the skimcoat. We taped the woodwork because I am a sloppy painter. Then we primed. We figure we had about 40 hours of work in the room before the first coat of paint went on. I'm really proud of how smooth the walls are now. Here are the walls before paint. Doug, David and I all worked on this.

Now with paint. The gold is a very rich gold but seems to come out yellow in the pictures. I'm really happy with the way this project has turned out. And not a minute too soon because we are having company stay in this room tonight.
Thursday, July 06, 2006
Pictures of guest room walls in transition
Here are the pictures of the starting-to-be-repaired walls that didn't fit in the last post.


How to destroy a perfectly good bedroom
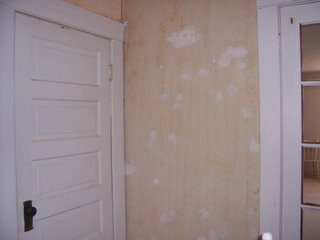
I decided that the guest room needed to be the first major project that I would attack. Doug contends that getting the air conditioning hooked up was a major project and I agree but I really didn't have anything to do with that so my first major project is the guest room. It has plaster walls which had at least 4 layers of wallpaper and a couple layers of paint. The room started out like this, a perfectly nice room if you didn't look at the walls too closely. Every seam and crack in the wallpaper were obvious if you looked closely.

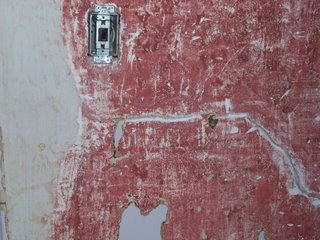
The wallpaper was really dry and the majority of the actual paper came off in large pieces without having to apply any kind of moisture or solution to it. It went really well for a while. When we got to the bottom layer, something else appeared. I still don't know what it is. It was a thick red stuff on about 3/4 of the wall surface that had to be washed off with water. There was some brown stuff that had to be washed off but nothing like this thick red stuff. I'm assuming it was a combination of the wallpaper paste and the backing of the first wallpaper that had been on for 100 years. It was probably, literally, 8 hours worth of work to get this red stuff off.


After cleaning that red stuff off the walls for what seemed like forever, I started patching the millions of nail holes with lightweight spackling. That worked well for the regular nail holes. There were a couple of good size cracks that Doug decided to patch with actually patching plaster. As he worked on this, he came to a realization that he would rather just put a skimcoat over the entire surface of the walls. He decided that since we had put so much time into these walls, he wants them to look really good so he used what he had on hand last night and will finish up tonight after buying some more. Then we can prime and paint. These walls should look good. Pictures of the starting-to-be patched walls in the next post.
Monday, July 03, 2006
Small (miniscule) signs of progress
We're back from our convention in Louisville and need to get to work on the house for a few days before we leave for our nephew's wedding in Denver. Here are the few things we've been able to accomplish so far.
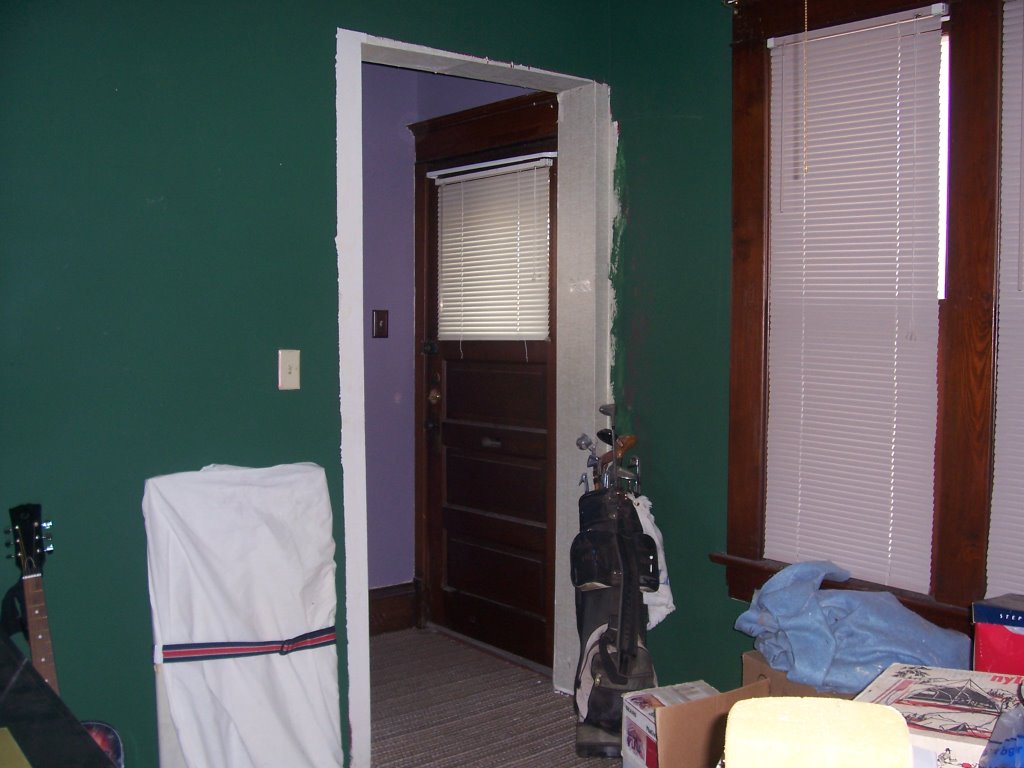
One of our bedroom doors was missing. All the doors in the house are 5-horizontal panal doors so we wanted to match that style. We were lucky enough to find one at the local "antique" (junk) shop for $15.00. Not a bad price for a solid wood door! Anyway, as you can see, Doug and I are now officially room 14.

We have removed the wallpaper border that was in the living and dining room. It was practically falling off by itself and definitely not our style. I'm anxious to get some paint on the walls of our white box living room.

I took the screen door off the front door because it was just ugly and was hiding what we believe was an original front door to the house. Obviously, those strange sidelights were not original.

We took out the cabinet in the room off the living room that was blocking access to the front stairs. We believe the wall was completely open originally to show off the stairs and we will get to that eventually. Right now we are just glad we can get to the stairs without going outside. As you can see, this is the room we are keeping all unopened boxes in until we find time to open them. It's amazing to have a room that we don't actually "need" for any productive use at this time.

We've done a lot of things that don't show up in pictures like getting the air conditioning running on the second floor. That was essential. I'm in the middle now of destroying the guest bedroom. I'll put some pictures of the destruction up tomorrow and some pictures of our cat's latest adventure in home renovation.
One of our bedroom doors was missing. All the doors in the house are 5-horizontal panal doors so we wanted to match that style. We were lucky enough to find one at the local "antique" (junk) shop for $15.00. Not a bad price for a solid wood door! Anyway, as you can see, Doug and I are now officially room 14.

We have removed the wallpaper border that was in the living and dining room. It was practically falling off by itself and definitely not our style. I'm anxious to get some paint on the walls of our white box living room.

I took the screen door off the front door because it was just ugly and was hiding what we believe was an original front door to the house. Obviously, those strange sidelights were not original.

We took out the cabinet in the room off the living room that was blocking access to the front stairs. We believe the wall was completely open originally to show off the stairs and we will get to that eventually. Right now we are just glad we can get to the stairs without going outside. As you can see, this is the room we are keeping all unopened boxes in until we find time to open them. It's amazing to have a room that we don't actually "need" for any productive use at this time.
We've done a lot of things that don't show up in pictures like getting the air conditioning running on the second floor. That was essential. I'm in the middle now of destroying the guest bedroom. I'll put some pictures of the destruction up tomorrow and some pictures of our cat's latest adventure in home renovation.
Subscribe to:
Posts (Atom)